Friday, January 13, 2012

Christmas Card 2011

Sorry, I'm very late in posting my Christmas card for 2011. I actually finished the card early December and was able to mail them on time. I was so worried about snail mail and was very relieved to be told by the recipients that they did get them before Christmas.

I used acetate (also called transparency film) for the base of the card to which I adhered the bling-bling embellies. The Christmas ornaments design is a set from the Silhouette store. The flourish is originally from the Silhouette store, too, which I recreated by duplicating the design and mirroring it and welded the 2 sides to a tag to turn it into a flourished tag. I used DCWV Mango Frost for the ornaments.


Monday, January 9, 2012

A Decorated Keepsake Box

Everybody just loves the decorated index card box (http://ligayatg.blogspot.com/2011_08_01_archive.html) that I made for my friend and my niece requested me to make one for her. So here is another decorated box that I made for my niece, Tata, which she will use for her keepsakes.

I used my new Silhouette Cameo for all the designs on this box. I just love my Cameo!!! I used the same daisy flower design (tutorial on my post:  http://ligayatg.blogspot.com/2011/04/3d-flowers.html) that I used on Benjie's box. I used plain cream card stock for the flowers which I sprayed with my homemade glimmer mist (http://ligayatg.blogspot.com/2011/04/homemade-glimmer-mist.html) to match the colors of the pattern paper (DCWV) that I used to cover the box. I used the glimmer mists that I made back in August and I was impressed that the quality and consistency of the mists remained the same. 

I would like to be able to make keepsake boxes for my other nieces, too.


Monday, January 2, 2012

Faux Leather

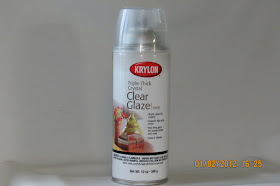
My first post for 2012 is about another technique in paper crafting called 'faux leather' which I fell in love with. I learned about this technique from the Resources in the Splitcoast Stampers website. But instead of using the embossing process used in the tutorial with the use of embossing powder and heat gun to make the material shine, I applied my own technique using Krylon's Triple-Thick Clear Glaze spray (photo below, purchased from Joann.com) and got amazing results. As you'll see from the photos, the cardstock is transformed into leather-like material. The project made in the tutorial is a wallet. I was in the middle of making post-it/note pad holders for my Christmas giveaways so I applied this technique to the remaining holders that I was making. I experimented on different colors and all the colors turned out great. I used the same Cuttlebug embossing folder used in the tutorial called Tiny Mosaic. Should you decide to use the Krylon Clear Glaze spray, make sure to follow the directions on the can. You need to apply full wet coat. I applied 2 coats. If you don't apply a full wet coat and just apply a misty spray, you won't get the thick glaze effect but instead will get ugly powdery specks.

The first photo demonstrates the transformation from 1) plain cardstock, 2) embossed with the Cuttlebug machine using the Tiny Mosaic folder, 3) colored with dye ink pad using Tim Holtz blending tool (photo below) and 4) sprayed with Krylon Clear Glaze.

BTW, for those wanting to know what closures I used for the notepad holders, I used the small size of the magnetic snaps by Basic Gray (photo below, purchased from Joann.com). For more information on the post-it/note pad holders, please refer to my previous post,  http://ligayatg.blogspot.com/2011/11/note-pad-holder-nice-christmas-stocking.html

I found other techniques on how to make 'faux leather' but I've only tried the first one using my Cuttlebug embossing machine:

1) Technique using an embossing machine::
http://www.splitcoaststampers.com/resources/tutorials/fauxleatherwallet/

2) Technique embossing with embossing powder and heat gun: